Bathroom water damage & rot repair
A major leak behind the bathroom wall had caused water damage and rot. Opening the shower wall revealed the extent of the damage. These 22 photographs follow the work from the exposed wall and removal of old materials through rebuilding, tile installation and the finished bathroom.
22 project photographs · Select any photo to enlarge it.
Water damage hidden behind the shower tiles.
The visible tile finish was only part of the story. Once the shower wall was opened, deteriorated backing and damaged material became visible around the enclosure and beneath the shower threshold. The original cream-and-brown tiles sit beside the exposed wall in these photographs, showing why the renovation involved more than replacing a surface finish.
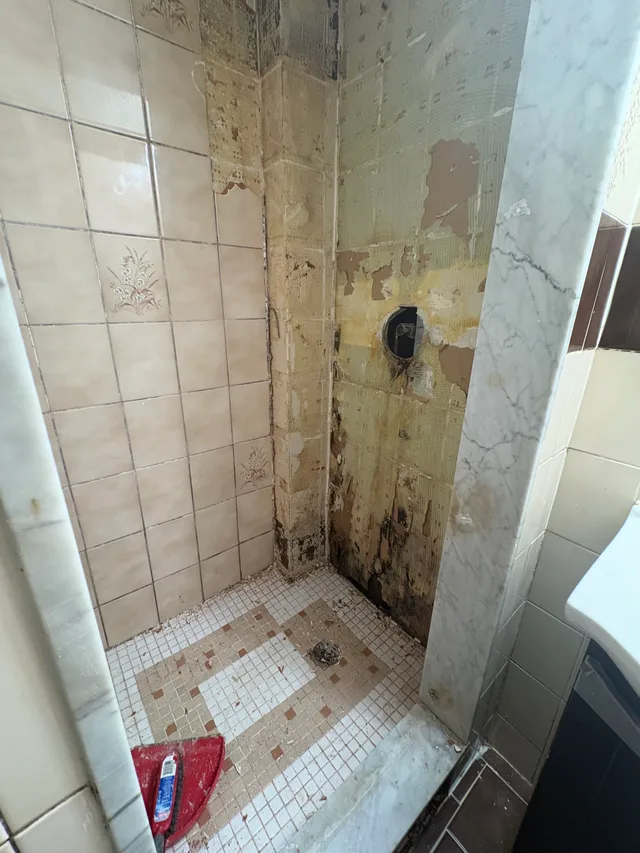
The shower wall opened
Original patterned tiles beside the opened shower wall, with damaged backing visible around the valve and lower corner.
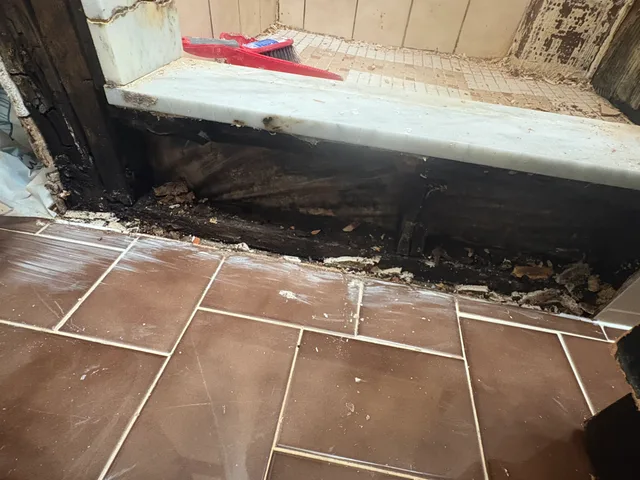
Damage beneath the threshold
The opened shower threshold reveals deteriorated material beneath the original tiled entrance.
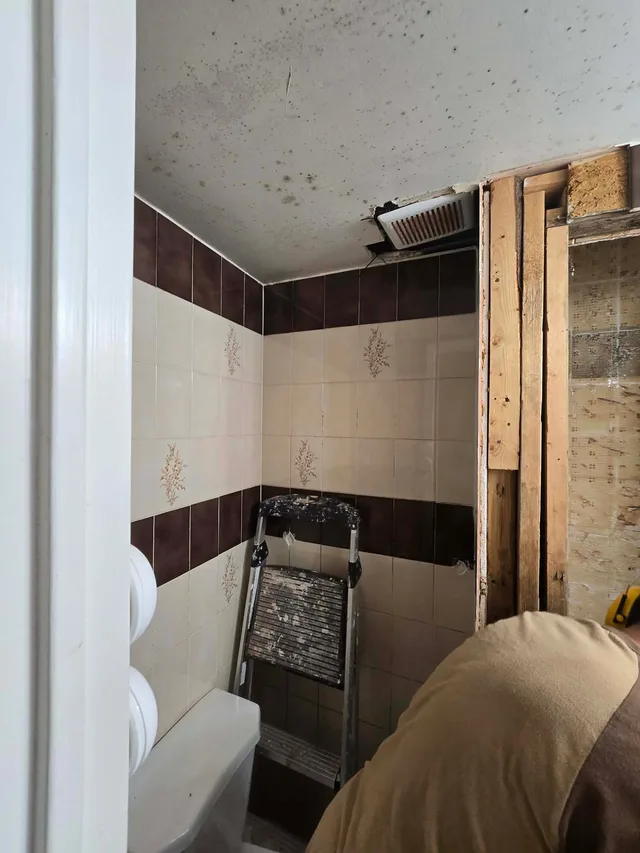
The original bathroom surfaces
Original cream and brown tiles, ceiling spotting and the opened edge of the shower wall.
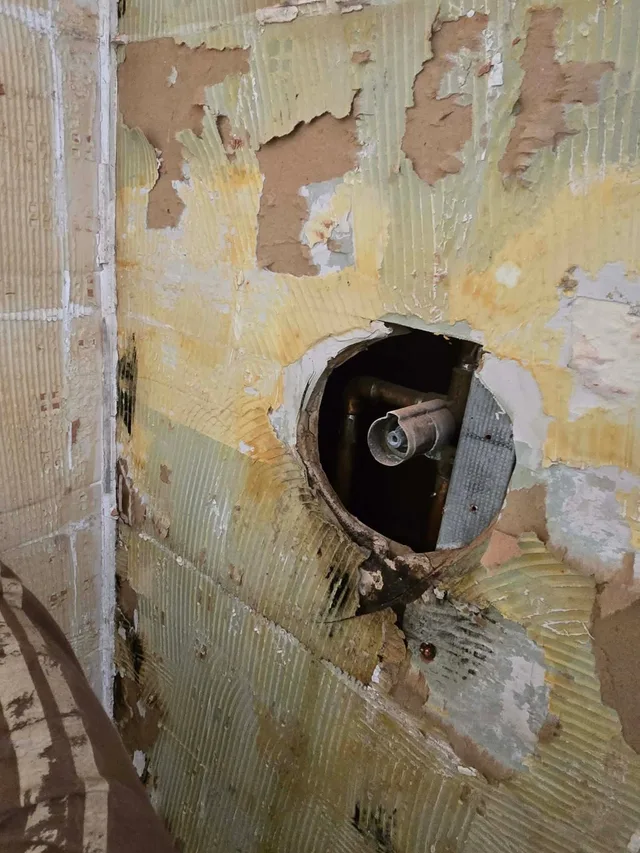
Behind the shower fitting
Tile removal exposes the wall backing and opening around the shower valve.
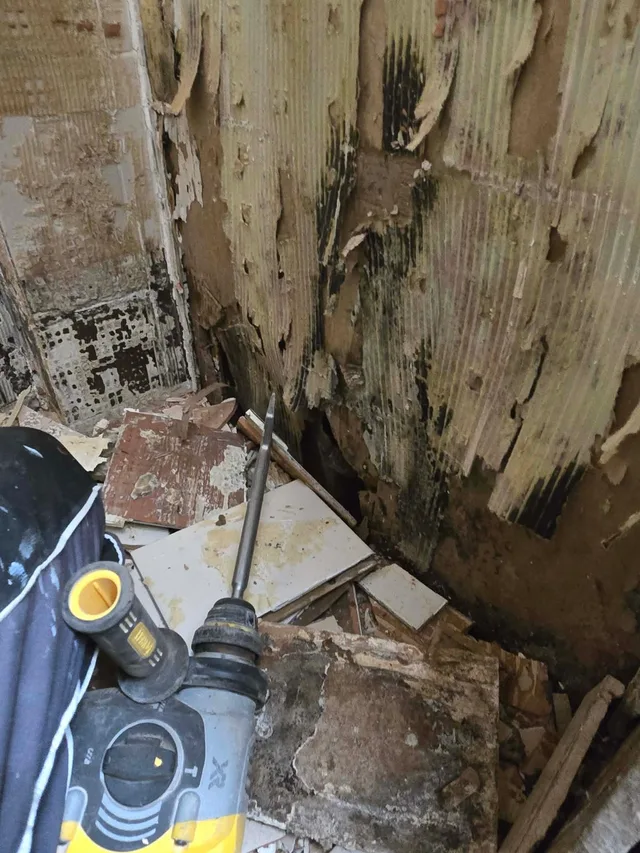
Damage behind the tiles
A closer view of the discoloured backing uncovered behind the shower tiles.
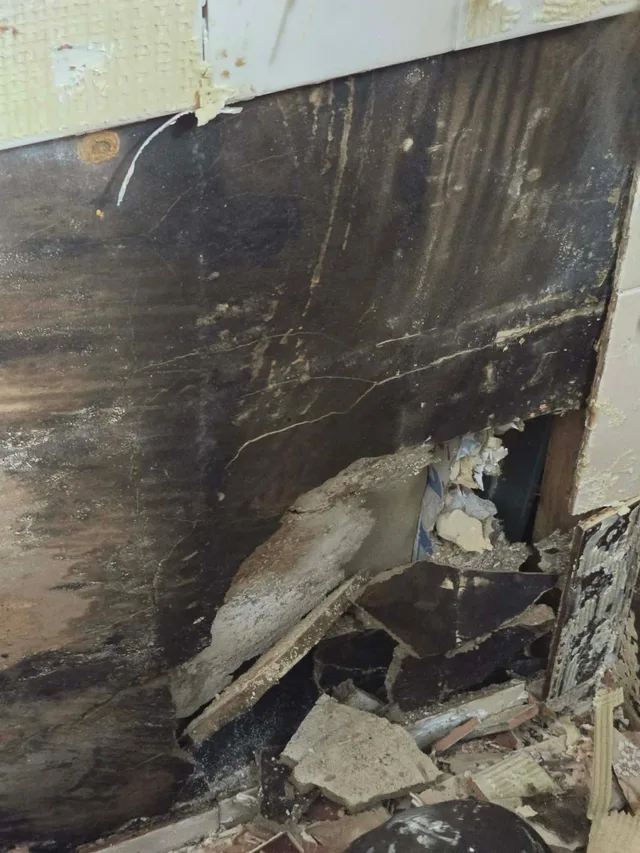
The extent of the hidden damage
The opened wall shows darkened backing, broken material and an exposed cavity.
The problem was a major leak within the wall and the water damage and rot it had caused. These close-up views document the condition uncovered during opening-up work, including the wall cavity, backing around the shower fitting and the base of the enclosure.
Opening up, rebuilding and tiling.
Removal exposed the affected wall structure. The photographs below follow the shower rebuild through demolition, new wall boards and backing panels, and tile installation.
Remove the damaged materials
Old tiles and wall materials are removed to open up the shower and expose the underlying structure.
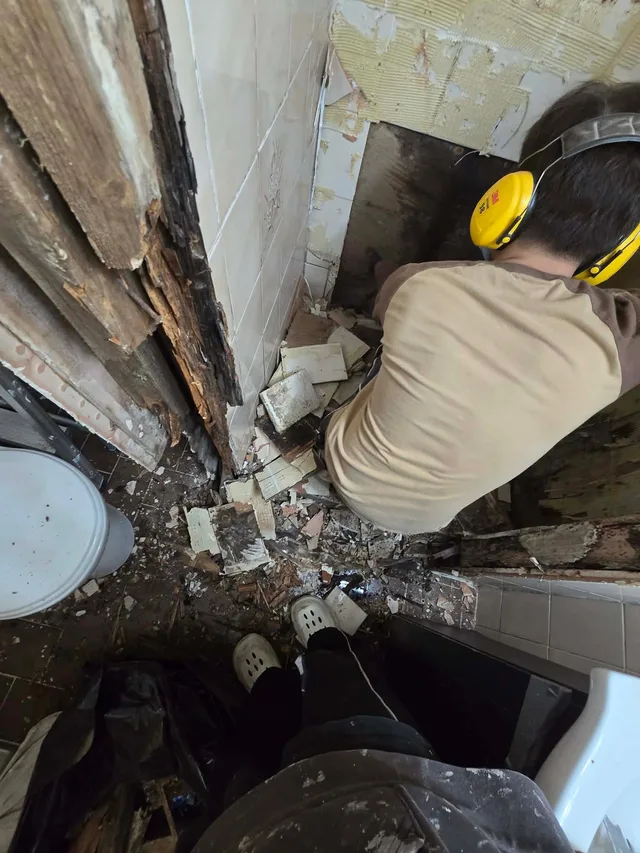
Removing the damaged materials
Work underway inside the shower as the old wall materials are removed.
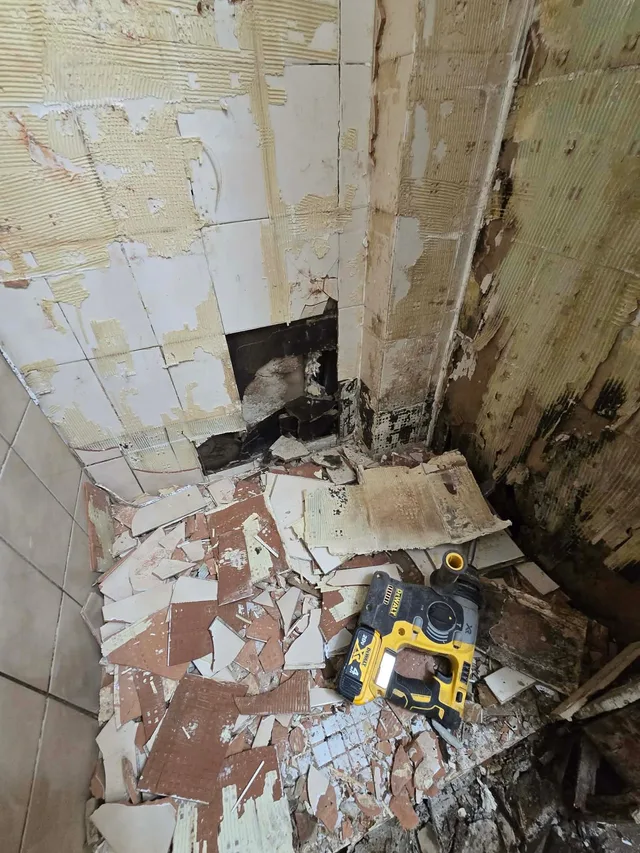
Opening the shower enclosure
Broken tiles and removed wall material gather at the base of the shower during demolition.
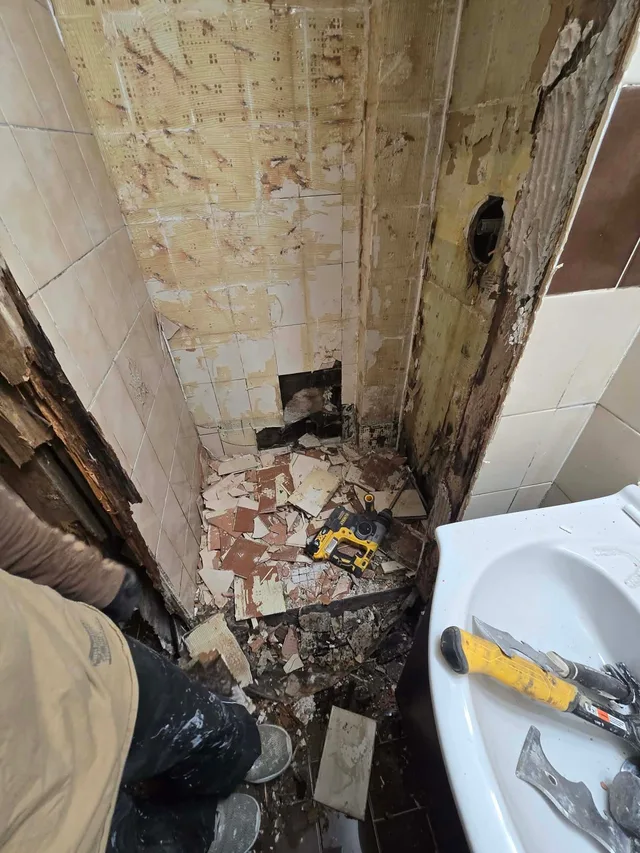
Removal work beside the sink
A wider view of the opened shower and the removal work around its base.
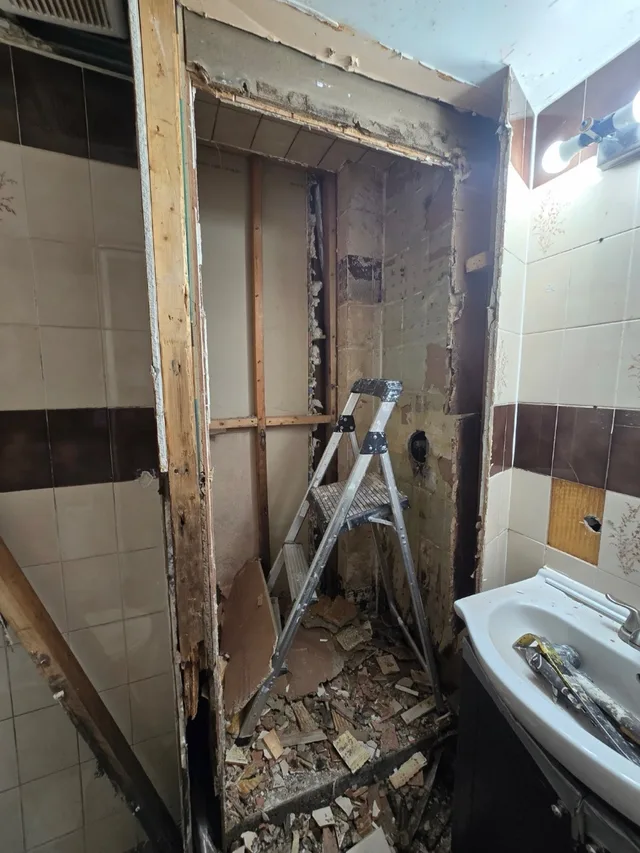
Exposing the wall structure
The shower wall is opened to the framing while removal work continues.
Prepare the shower and adjoining walls
Wall boards and backing panels take shape around the enclosure, sink and adjoining wall.
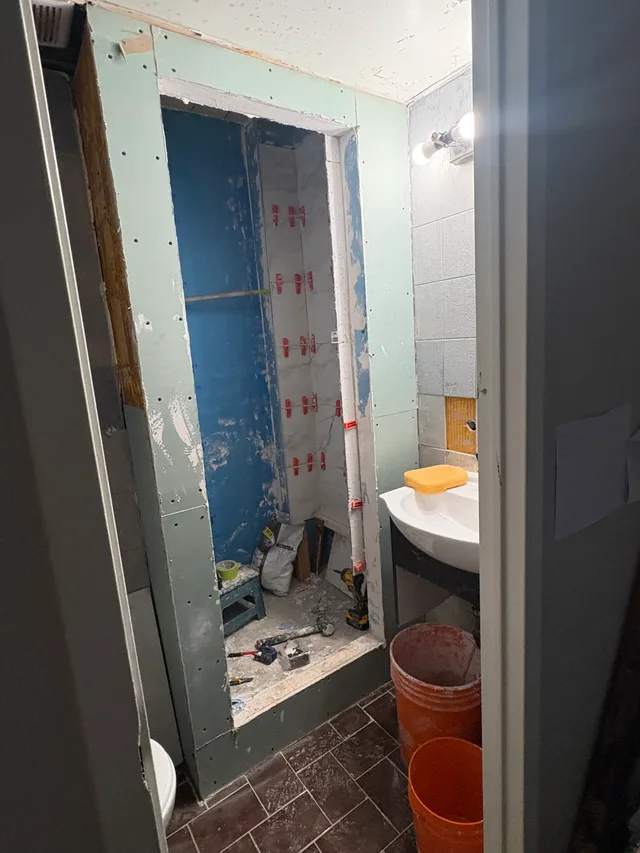
Preparing the shower walls
New wall boards around the shower opening, with blue and white backing panels visible inside.
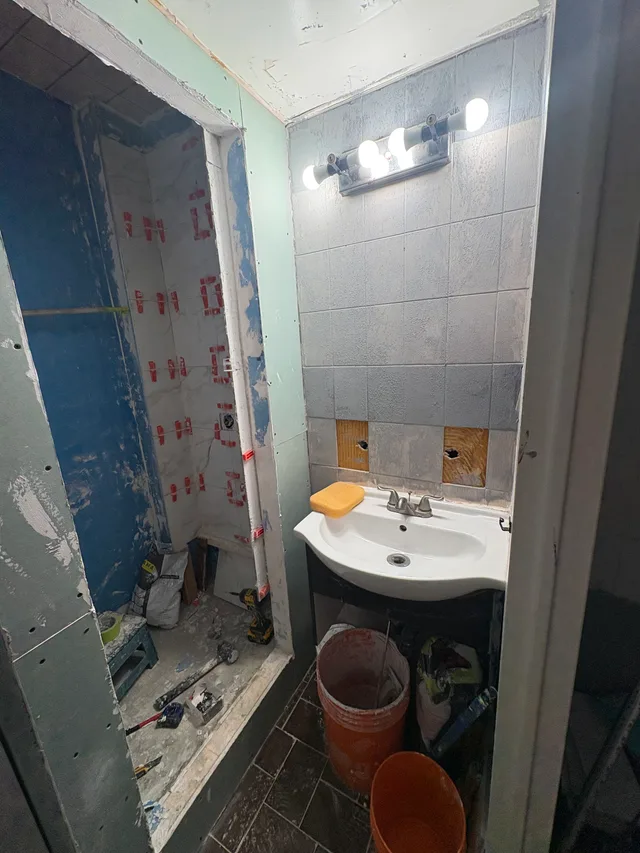
Rebuilding beside the sink
The shower backing and doorway edges during the next stage of wall preparation.
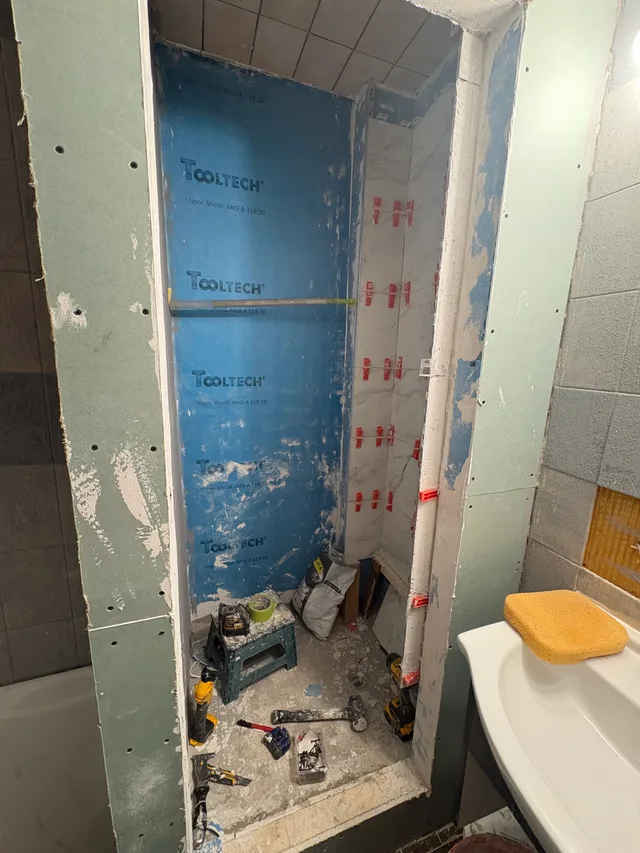
Inside the prepared enclosure
A closer view of the shower backing panels before the new tile covers the walls.
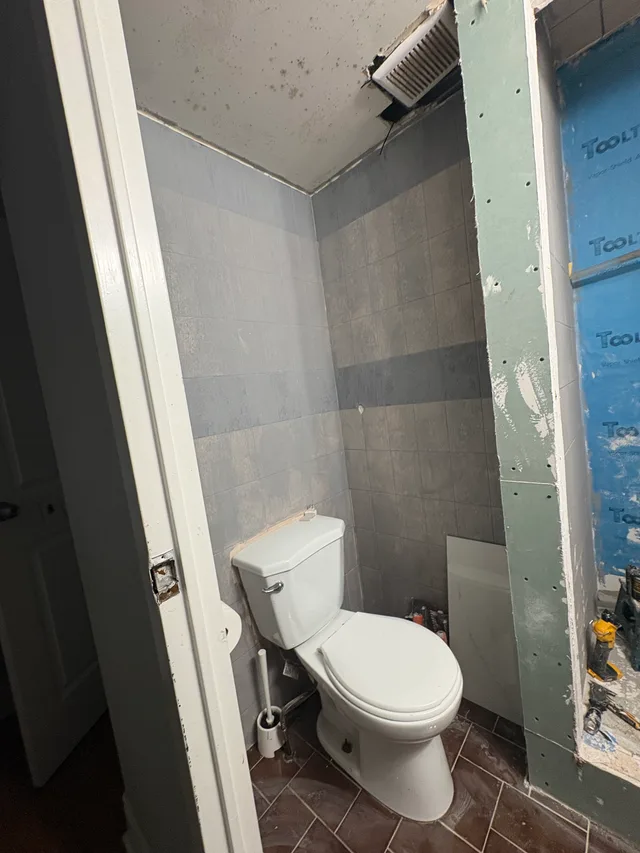
Preparing the adjoining wall
Work extends to the bathroom wall beside the toilet and shower opening.
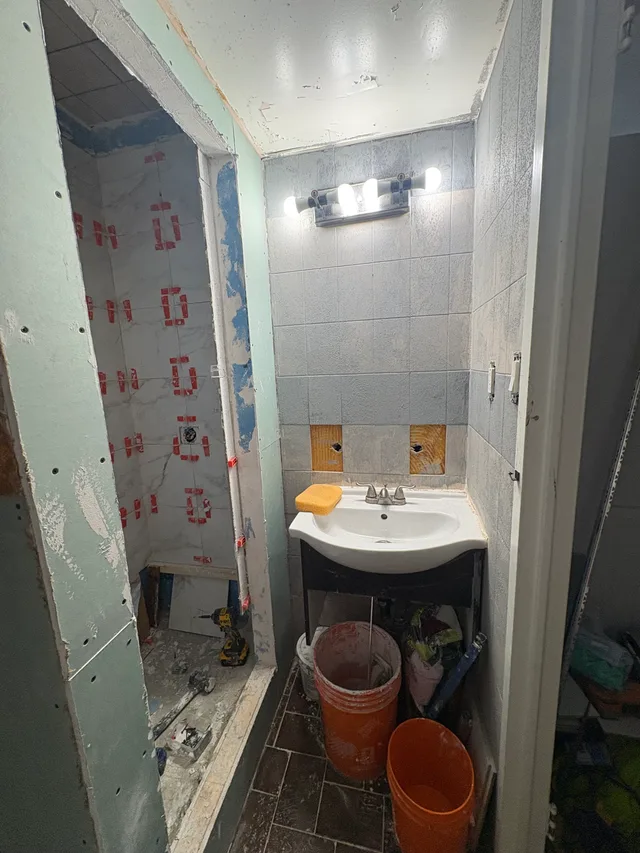
The shower surround in progress
A further view of the wall boards and surfaces around the shower and sink.
Install the new tile finish
The new wall tiles are fitted around the shower, with tools and levelling clips still visible.
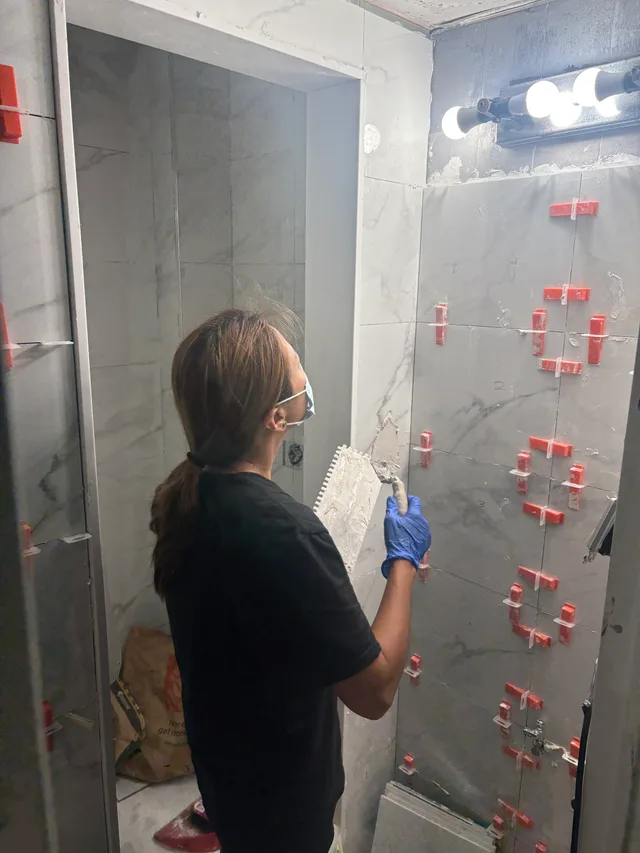
Setting the new wall tiles
Wall tile installation underway, with red leveling clips holding the new tiles in place.
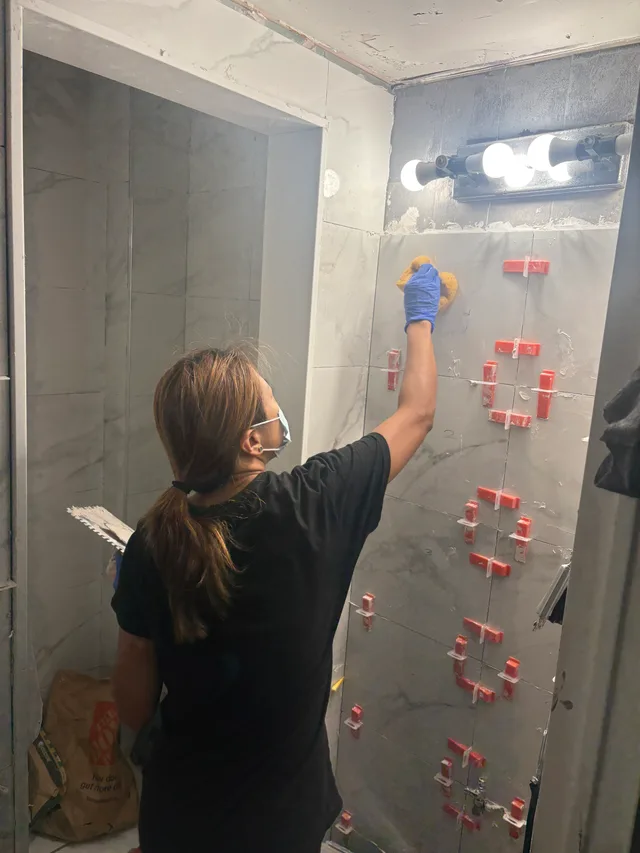
Tiling by hand
Rachelle works along the new bathroom wall tiles beside the shower opening.
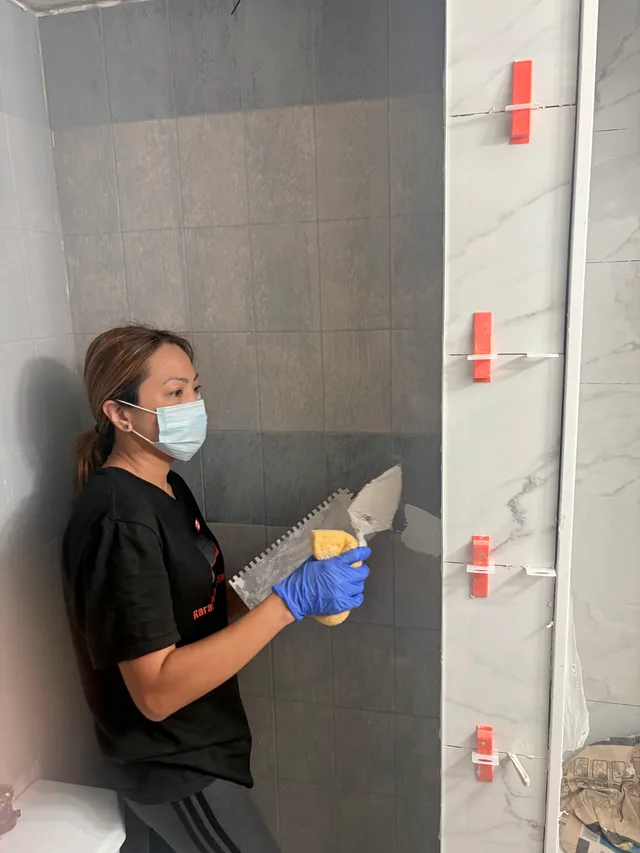
Working along the shower edge
Tile work continues around the shower entrance with leveling clips still in place.
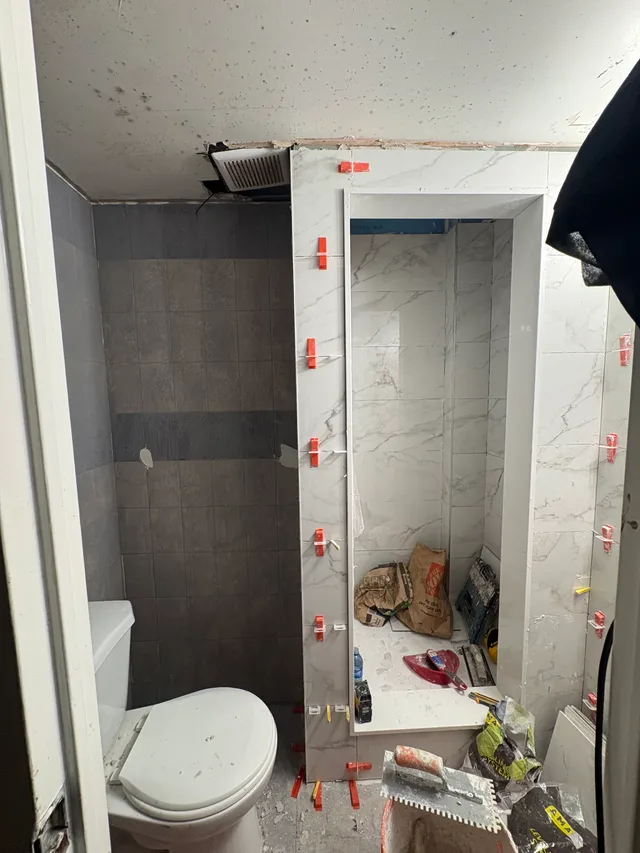
The new finish taking shape
Marble-look tiles cover the shower while tools, materials and leveling clips remain on site.
A finished shower and bathroom.
The final three views show the rebuilt bathroom: marble-look tiled walls, chrome shower fittings, a glass shower door and a vanity. One photograph looks inside the shower, one shows the adjoining tiled wall, and the last brings the enclosure and vanity together from the doorway.
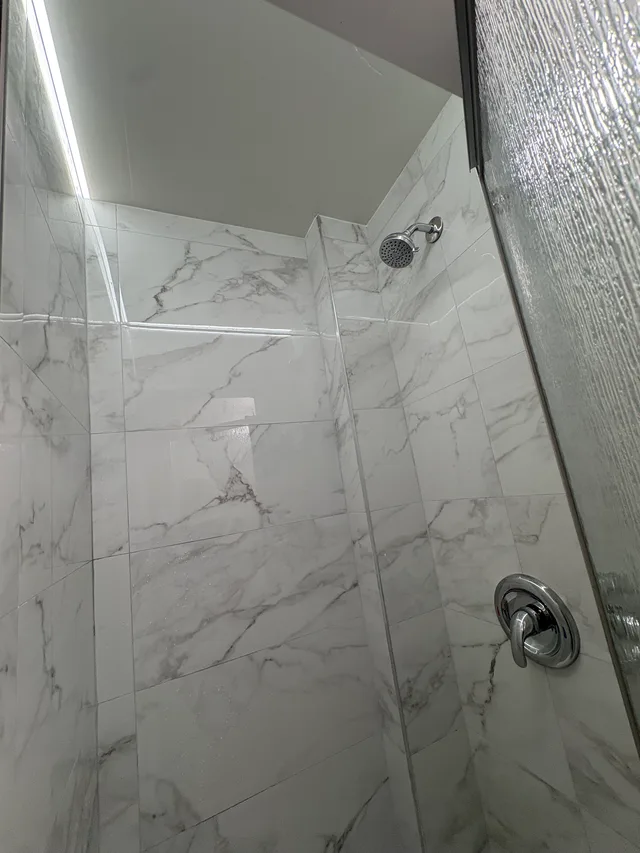
Inside the finished shower
The completed shower interior with marble-look wall tiles and chrome fittings.
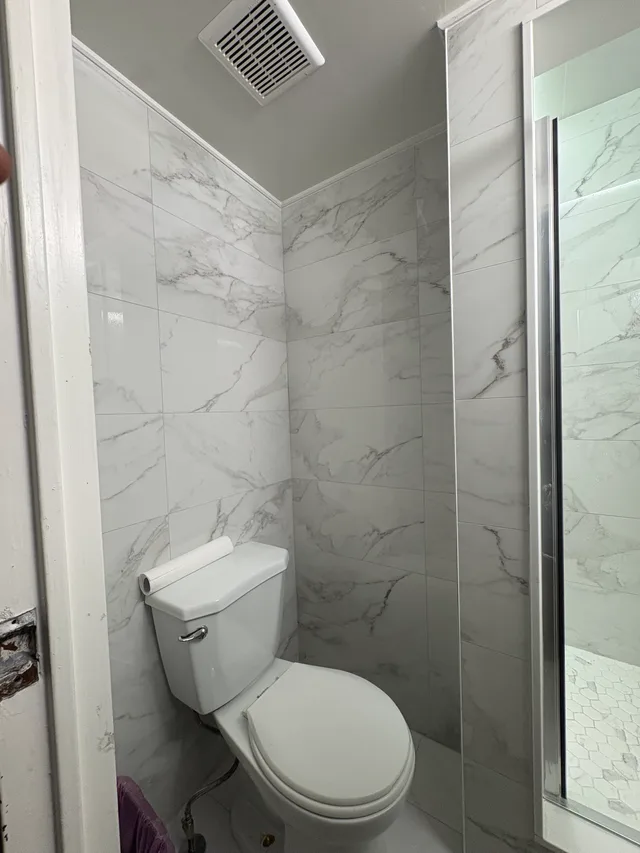
The finished bathroom surfaces
Marble-look wall tiles continue around the toilet and shower entrance.
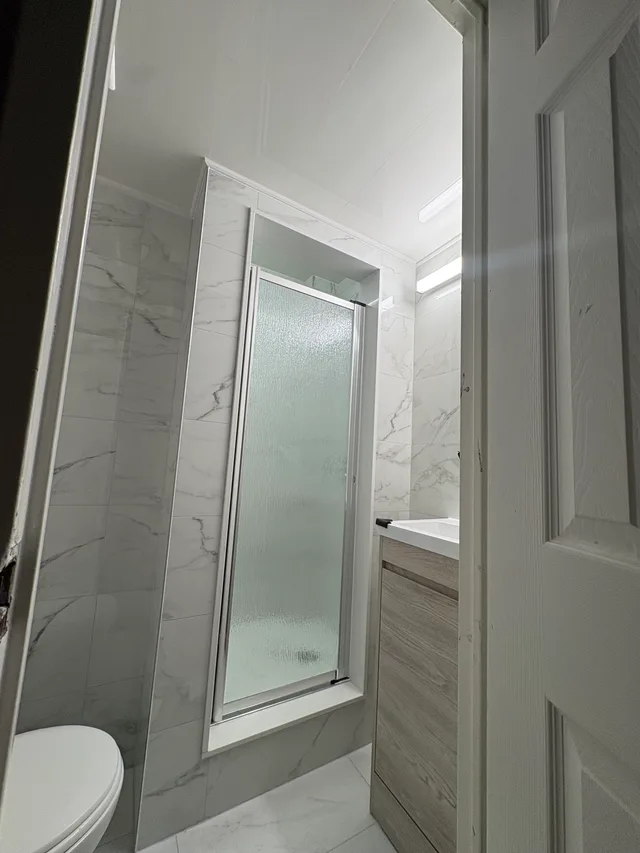
The finished bathroom
A doorway view of the finished shower enclosure, tiled walls and new vanity.
From concealed damage to finished surfaces, the photographs connect the problem with the physical work needed to rebuild the room. The result is shown in the same compact bathroom, with its shower, toilet and sink arrangement visible throughout the sequence.
Planning a bathroom renovation after water damage?
Describe the leak or damage you have noticed, the areas of the bathroom affected and the finish you would like. Overall room photographs and close-ups of the shower, wall or threshold help Raras Renovations understand your enquiry. Rachelle can arrange a visit so the team can assess the space and discuss the scope before preparing an estimate.
What did the opened shower wall reveal?
A major leak behind the wall had caused water damage and rot. The project photographs show deteriorated wall backing, exposed cavities and damaged material around the shower enclosure and threshold.
What repair stages can I see in this project?
The sequence includes removal of old tiles and damaged materials, exposed wall structure, preparation with new boards and backing panels, tile installation and the finished shower and bathroom.
Can I discuss bathroom water damage in Toronto or North York?
Raras Renovations serves homeowners in North York, Toronto and across the GTA. Send your location and a description of the affected room so the team can discuss an assessment and the work you have in mind.
A bathroom that needs attention?
Tell us about the damage, the room and your renovation plans.
